
Chapstick and Gift Card Holder


Colors
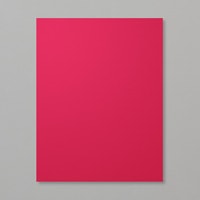
Real Red, Secret Sea, Pool Party, Basic White, Gold, Old Olive
Measurements
- Chapstick and Gift Card Base Real Red 4” x 9”
- Score at 1 ½”, 2 ¼”, 5 ¼” and 6”
- Round the four Corners
- Chapstick Holder (strip) Real Red 4 ½” x 1”
- Score at 1 ½” and 3”
- Gift Card Pocket Real Red 2 ¾” x 2”
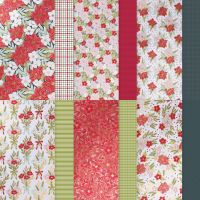
- Decorative Designer Series Paper for all the sections. *Note: Watch direction of the paper
- (2) For the Flaps 3 ¾” x 1 ¼”
- Round two of the Corners on each
- (4) For the Main Sections 3 ¾” x 2 ¾”
- Round two Corners each on only two of them
- (3) For the three Folds (don’t place by the Chapstick) 3 ¾” x ⅝”
- (1) For the Gift Card Pocket 2 ½” x 1 ¾”
- (2) For the Flaps 3 ¾” x 1 ¼”
Instructions
- Cut Chapstick and Gift Card Base Real Red 4” x 9”
- Score at 1 ½”, 2 ¼”, 5 ¼” and 6”
- Round the four Corners
- Cut Chapstick Holder (strip) Real Red 4 ½” x 1”
- Score at 1 ½” and 3”
- Cut Gift Card Pocket Real Red 2 ¾” x 2”
- Cut Decorative Designer Series Paper for all the sections. *Note: Watch direction of paper
- (2) For the Flaps 3 ¾” x 1 ¼”
- (4) For the Main Sections 3 ¾” x 2 ¾”
- Round two Corners each on only two of them
- (3) For the three Folds (don’t place by the Chapstick) 3 ¾” x ⅝”
- (1) For the Gift Card Pocket 2 ½” x 1 ¾”
- Adhere Chapstick Holder strip: Place tear-n-tape on the two ends of the strip. Adhere the first end as shown. (The strip with the contrasting color is for demonstration only)


- Place chapstick in the fold, and wrap the Chapstick Holder strip snugly. Adhere the second end. Note: You may want to add just a mini-dot or small amount of tear-n-tape on the back of the Chapstick. Don’t add too much or your recipient won’t be able to extract it! (Ask me how I know!)


- Optional: If you are going to use magnets for the closure, add them now before you add the Designer Series Paper. One goes under the small flap (on the right), and the other gets aligned to that and placed on the base (with the flap closed). Make sure they are far enough in that they won’t show past the Designer Series Paper once it is adhered.
- Note: You can skip this step and close with either a belly band, or by wrapping a ribbon around and tying a sweet bow.

- Decorate the base by adding the Designer Series Paper (DSP) layers as shown above.
- If you are making a gift card, you can add the pocket as shown – first adhere the cardstock pocket (leaving enough room for the gift card to slide in and out). Then add the Designer Series Paper.
- Optional: If you don’t want to add a gift card, you can add a little note card or tag to tuck inside. The possibilities are endless!

- Optional: You can add a miniature piece of candy on top of, or in place of, the gift/note card.
- You can decorate the front with a bow, a tag, a belly band, or as you desire.

- Corner Rounder
- Optional: Magnets
- Chapstick
- Optional: Gift Card or Note Card
- Optional: Miniature Piece of candy


