Angled Gatefold – Paradise Garden Rainbow of Colors


Colors
Berry Burst, Blackberry Bliss, Blueberry Bushel, Coastal Cabana, Crushed Curry, Flirty Flamingo, Night of Navy, Poppy Parade, Pumpkin Pie, Shaded Spruce
Measurements
- Cardstock Base 4 ¼” x 5 ½” in coordinating color
- Cut Designer Series Paper 5 1/4” x 12”, score on the long side at 2”, 4”, 8” and 10”
- Make a pencil mark 3” up from the bottom on left and right sides. Cut paper on an angle from the pencil mark to the second score mark from each corresponding edge.
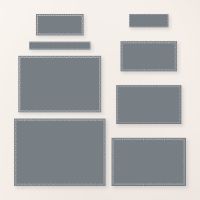
- Die-cut the layers for sentiments and decoration, as desired.You can use any shape labels for the front. Textured Notes Dies work great for this. If you don’t have Textured Notes Dies, here are the measurements to cut layers:
- 2 ¾” x 4 ¼” (for larger front layer)
- 2 ¼” x 3 ¾” (for Basic White front layer)
- 2 ¾” x 4 ¼” (for inside Basic White layer)
- NOTE: Die-cut circles work great too.
Alternatives: The Cardstock Base is optional. If you are not using a cardstock base, cut the DSP to 5 ½” x 12” (instead of 5 ¼”).
Instructions
- Cut Cardstock Base 4 ¼” x 5 ½” in coordinating color
- Cut Designer Series Paper 5 1/4” x 12”, score on the long side at 2”, 4”, 8” and 10”
- On the back of the design, make a pencil mark 3” up from the bottom on the left and right sides. It’s more fool-proof to pencil mark the left sides on the front, and the right sides on the back. Cut paper on the angle from the pencil mark to the second score mark from each corresponding edge.
- Die-cut layers for sentiments and decoration, as desired.Textured Notes Textured Notes Dies work great for this. If you don’t have Textured Notes Dies, here are the measurements:
- 2 ¾” x 4 ¼” (for larger front layer)
- 2 ¼” x 3 ¾” (for Basic White front layer)
- 2 ¾” x 4 ¼” (for inside Basic White layer)
- Burnish all the fold marks, and fold your Angled Gatefold into shape.
- Adhere the Decorative Layer centered on the card, but adhered to the left panel only.
- Adhere the larger Basic White layer on the inside.
- Decorate the smaller Basic White front layer and adhere it to the Decorative Layer on the Front.
- Sprinkle on the gems, and add a sweet bow.
BONUS: If you want to see how to assemble the card – watch the YouTube Video


Products
Product List